

Faculty Guide to Creating Course(s) folders in Box
Information Technology is replacing the in-house system for storing data with a cloud-based system called Box. Your data will now be accessible from anywhere with any device. Because of this we are discontinuing the X drive or Courses drive, and providing you with the ability to create and manage your own course(s) folders.
This guide will provide you with an organized process that will ensure your folders are named properly, secured, and easy for you and students to use.
Opening Box
- For this process I recommend you use the Box Portal. In your browser go to https://box.com and login or click Continue.
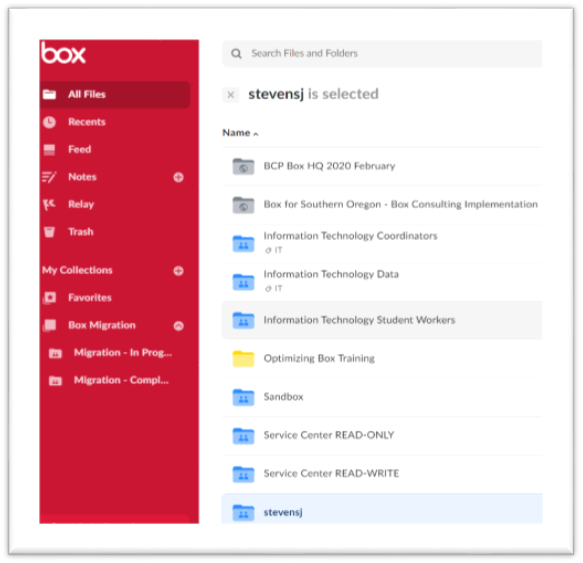
- You should now be in Box with All Files selected on the left navigation pane. The folders you see on the right are folders and files that have been shared with you.
Creating the Courses Folder
- Click to open your personal drive (has your username on it – stevensj is shown here).
- Click on New and choose Folder in the resulting menu.

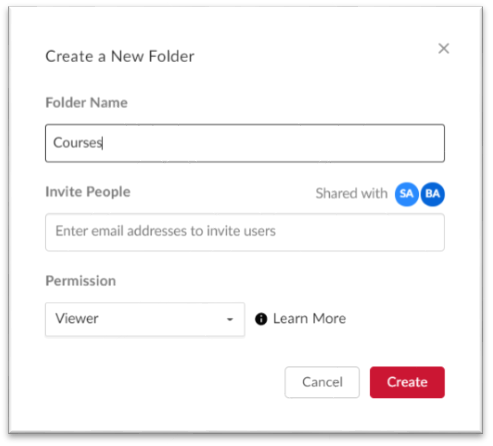
Let’s name this one, Courses, and we’ll create our different course sub-folders under it, so you’ll easily be able to find all your courses in one area. Don’t invite anyone to this folder, we’ll do that in the sub-folders we are about to create. Don’t worry about Permissions here either.
Creating your Sub-Folders
- Click your newly created Courses folder to open it. There is, of course nothing in it at this point.
- We will now create any additional folders that are needed within the Courses folder. There may be a number of reasons why you want to share folders with students or colleagues. I am going to cover two of them for you here:
- Perhaps you want to share course documents, videos, bulletins, or technical papers. These would probably only need to be viewer only permissions (this will allow them to view and download the documents but not edit them).
- Perhaps you want to allow students to upload materials but not be able to see the content in the folder.
- To create the first folder, we will use the same process as before.
- Click on New and in the resulting menu choose Folder
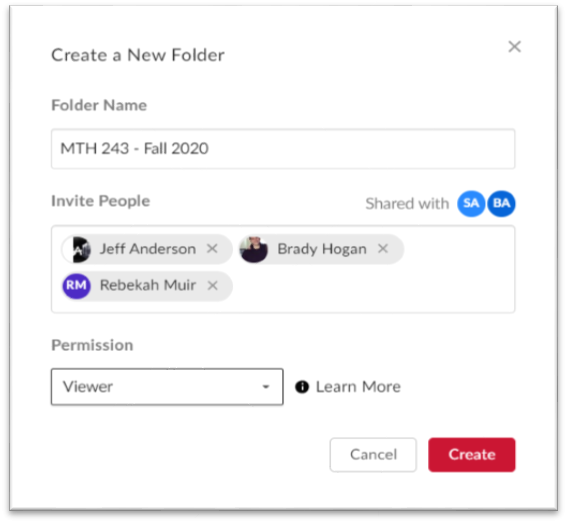
- This time, however, we will name our folder using the Course Name and/or CRN #. In this example we’ll use MTH 243 – Fall 2020[JB1][JB2] CourseFiles as the folder name to ensure that students recognize the course in their Box account.
- Notice the Permission box is labeled Viewer. This allows them to view the documents and download them, but not to edit them. If you want to give them other permissions, you can use the drop down arrow to change the permissions granted.
- Note: Because you are creating this folder in your personal drive you already have Editor permissions that are inherited throughout all of the folders in this structure. You are specifying the permissions for the people you are sharing the folder with.
- Click Create.
You should now have the knowledge you need to create the other folder which should be named MTH 243 – Fall 2020 Upload. Using the Permissions dropdown choose Uploader which will allow students to upload their papers but they won’t be able to see inside the folder and look at other documents.
Please download this or the helpful Exporting Class Email List for Box below.
For further assistance, please contact the IT HelpDesk at 541-552-6900.
Add a comment
Please log in or register to submit a comment.