

This article will show you how to use SOU's VPN service to access our campus network remotely. VPN access must be approved through the Information Technology department before you can use the service or properly follow along with the instructions in this article. If you think you need VPN access, please contact your Computing Coordinator or email helpdesk@sou.edu.
If you receive a connection error after you install the OpenVPN Connect client and you have followed these instructions exactly, contact your Computing Coordinator right away. We have observed an issue where some computers running Windows 10 build 1803 cannot connect to our VPN service through the client. Updating to the latest build of Windows 10 fixes the issue, and your Computing Coordinator can guide you through that process if your device requires it.
FAQ
What is a VPN?
VPN stands for Virtual Private Network. A Virtual Private Network refers to a method of securely connecting remote computers to a host network over the Internet through a secure, encrypted tunnel. Computers connected to the SOU network over our VPN service appear on our network as though they were physically on campus even though they may be anywhere in the world, which makes all of our online campus resources available to them.
Is using the VPN service secure?
Yes, our VPN service is very secure. All of your data is encrypted between your computer and our servers as it travels over the Internet through the VPN tunnel. Using the VPN service is as safe as using your computer on our physical campus.
Is using the VPN service going to slow down my computer?
No, using the VPN service will not slow down your computer, but you may notice some latency in your web browsers or when you work with files on your P, S, or X drives because all of your data must travel over the Internet to our servers before anything else can happen. The latency should be very minor if you have a fast Internet connection. Unfortunately, there is nothing we can do to eliminate that latency because it will always take time for signals to travel over the distances involved in Internet transmission.
What should I do if my Internet connection is slow or unreliable?
We strongly recommend that you make arrangements to do your remote work where you can use the VPN service over a fast, reliable Internet connection. Talk to your Computing Coordinator if you think that is going to present a challenge.
What are the criteria for receiving approval to use the VPN service?
The IT Department evaluates requests for VPN access on a case-by-case basis. The following list of criteria is not exhaustive, nor is any single criterion both necessary and sufficient for approval, but hopefully the list will give you an idea of what we consider. Even if we determine that the VPN service is not the best solution for you, we will work with you to ensure that you have what you need to do your work remotely by other means.
- Your job duties require you to have access to secure online systems that can normally only be accessed while on campus, such as Banner, Cognos, EMS for scheduling, Millennium FAST, and Perceptive Content.
- Your job duties require you to use specialized software that would be impractical or impossible for us to make available through our Remote Desktop environments.
- Your job duties require you to use software that would not perform adequately on our Remote Desktop servers because of their processor, memory, or graphical processing requirements.
- You have a laptop that is managed by the IT Department that you can use with the VPN service. We are not authorizing VPN use from personal devices.
How to Install the VPN Service on Your Computer (FIRST TIME CONNECTING)
Follow these instructions to prepare your computer for connecting to the VPN service for the first time.
 Windows Instructions
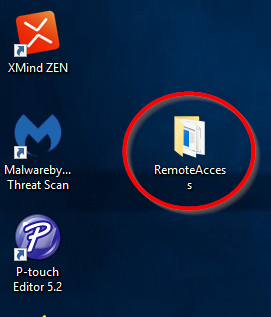
Step 1 - Locate the Remote Access folder on your desktop
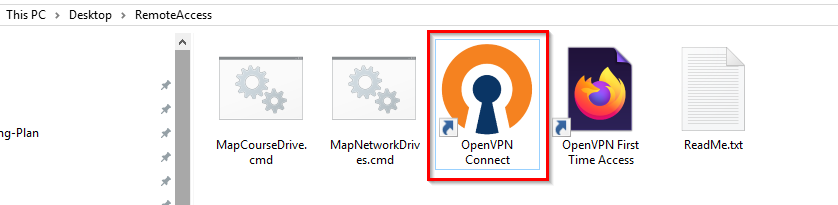
After you are approved for VPN access, you will receive a folder on your laptop's desktop titled RemoteAccess as long as you are on-campus. If you are off-campus, use this link to download a zipped copy of the folder that you can extract onto your desktop. The folder contains useful shortcuts for starting the VPN service and connecting to your SOU network drives (P, S, and X). If you cannot locate the folder, contact your Computing Coordinator for assistance.
The RemoteAccess folder contains useful shortcuts to help you connect to the VPN service. If you are on Windows, you will find the following files in the RemoteAccess folder:
- ReadMe.txt - This file contains condensed instructions for how to connect to the VPN service and how to use the other items in the Remote Access folder.
- OpenVPN First Time Access - Ignore this file if you are using the version 3 client.
- OpenVPN Connect - This shortcut will launch the OpenVPN software only after you have completed the instructions for first time setup. We will be using it later.
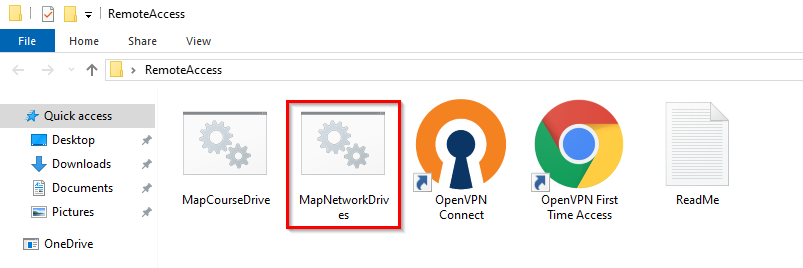
- MapNetworkDrives.cmd - This file is a batch script that will connect your computer to your Personal drive (P:) and your department Shared drive (S:) after you have connected to our network through the VPN service.
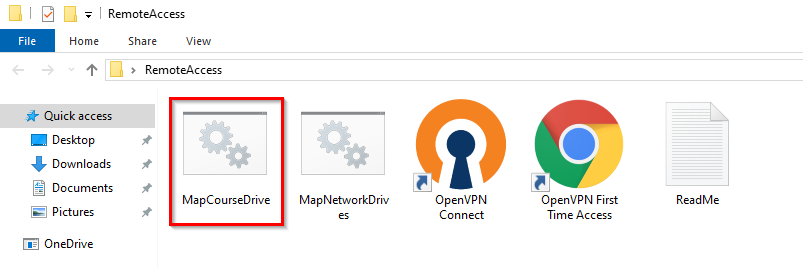
- MapCourseDrive.cmd - This file is a batch script that will connect your computer to your Courses drive (X:) after you have connected to our network through the VPN service. (Note: This drive is not relevant to staff, only to faculty.)
Step 2 - Install the OpenVPN v3 client
Download the client at https://openvpn.net/downloads/openvpn-connect-v3-windows.msi and install it on your computer. Then you can use the OpenVPN Connect shortcut in your RemoteAccess folder to launch the client.
Step 3 - Configure the OpenVPN v3 client
These instructions are the same for Windows and for Macintosh.
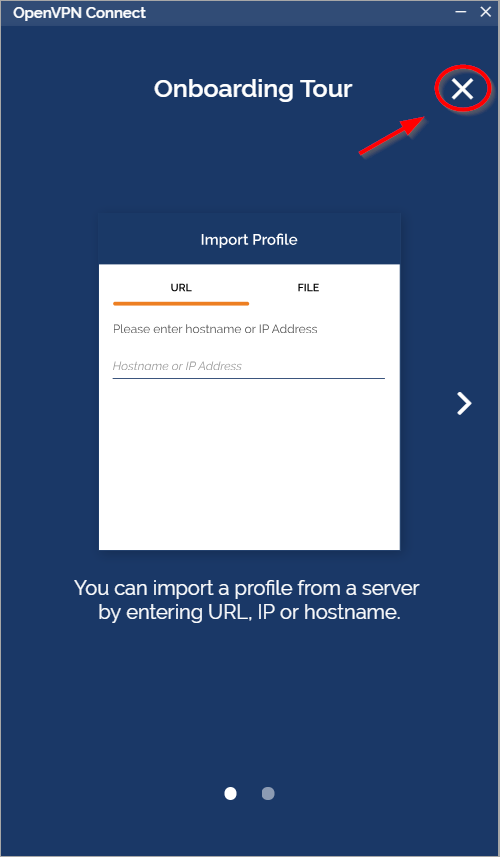
Skip the onboarding tour by clicking on the X in the top-right corner.
Agree to the terms of service, then enter https://openvpn.sou.edu in the URL field on the Import Profile screen.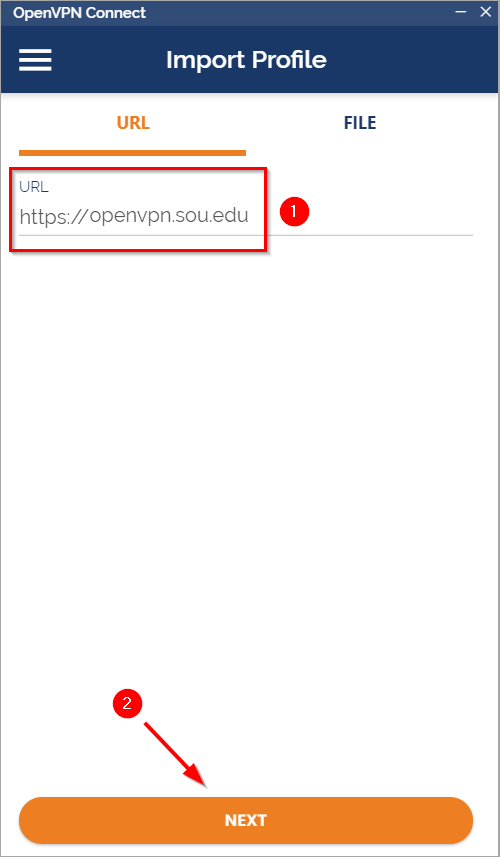
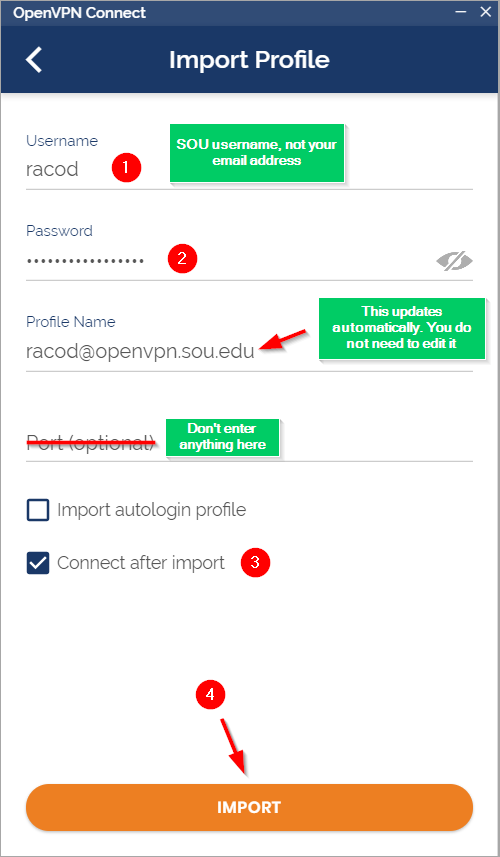
On the next screen, enter your SOU username and password, click the checkbox for Connect after import, and then click the Import button.
After you have provided your credentials, you will be required to complete your authentication with Duo.
If you do not have a Duo device that you can access away from your office, contact your Computing Coordinator immediately or follow these instructions to self-enroll another Duo device, such as a cell phone or a home phone.
You may enter any of the following into the text field, then click Continue, to complete this step (don't include any quotation marks). If you have more than one phone enrolled in Duo, you can append "2" or "3" (or higher) to the push option, the sms option, and the phone option to refer to that device specifically. (Example: push2, phone2, sms2; push3, phone3, sms3) Because it is difficult to know which phone is identified by which number, we recommend that you start with no numbers, then append "2", then append "3" if "2" does not work, and so forth until you receive the push notification, the text message, or the phone call on whichever phone you have access to at the time.
- "push" - Enter this to receive a push notification from Duo on your enrolled smart phone.
- "sms" - Enter this to receive a text message from Duo on your enrolled smart phone or cell phone.
- "phone" - Enter this to receive a phone call from Duo on your enrolled smart phone, cell phone, or desk phone.
- token code - If you have a Duo token or want to use a passcode stored in the Duo app on your smart phone, enter the code in the text field.
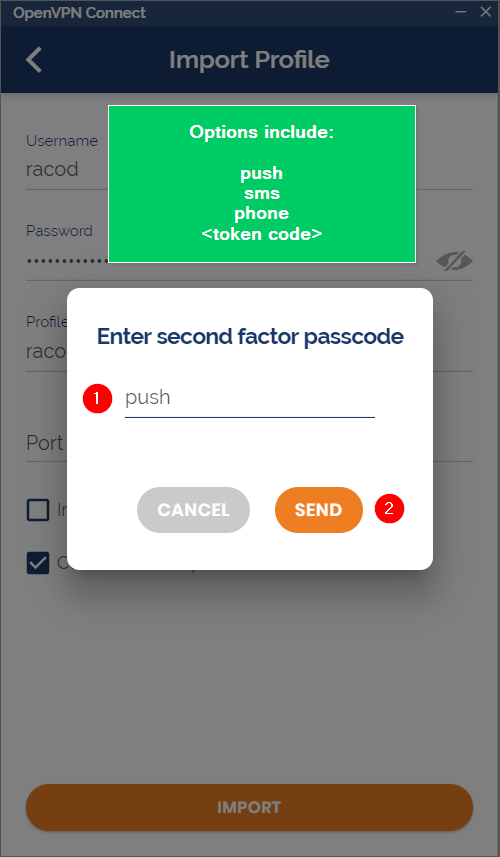
After you finish authenticating with Duo to import your profile, you will then be prompted to enter your password again. This is in order to actually sign you in to the VPN server.
After entering your password, you will be prompted to authenticate with Duo again. You have the same options as before.
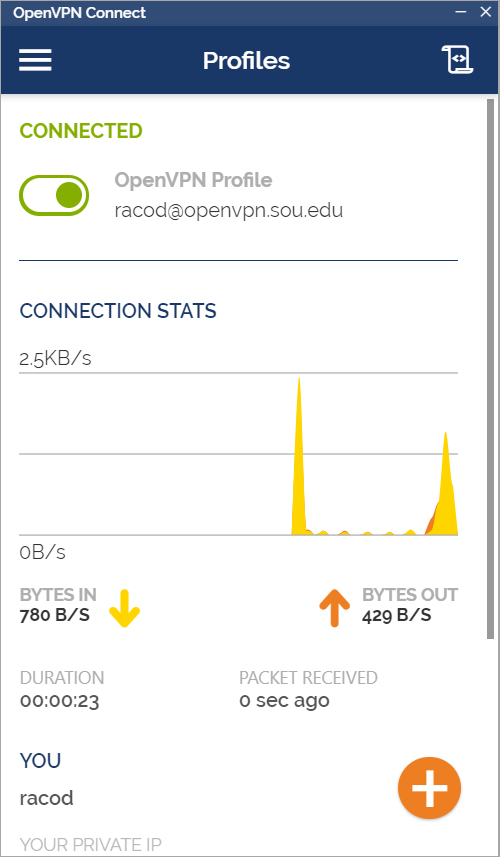
 When the connection goes through, you will see the following screen that shows your connection status and network usage.

 Macintosh Instructions
Step 1 - Navigate to https://openvpn.sou.edu and download the software
Download the Macintosh client from https://openvpn.net/downloads/openvpn-connect-v3-macos.dmg and install it on your computer. Find OpenVPN in your Applications folder and launch it. If the application window does not appear, look for the OpenVPN icon in your menu bar. Click it and then select Open App.

Step 2 - Configure the OpenVPN v3 client
Go to Step 3 of the above Windows instructions. The setup instructions are exactly the same.
How to Connect to the VPN Service
If you have not yet configured your computer to connect to the VPN service, follow the instructions provided above. Follow the instructions below only after you have installed the OpenVPN Connect v3 client on your computer.
Windows Instructions
Step 1 - Launch the OpenVPN Connect client and toggle the connection
You can conveniently launch the OpenVPN Connect client using the shortcut provided within the RemoteAccess folder on your desktop.
The client should open the connection window for you, but if it does not, then you will need to locate its program icon in your Windows notification area icons and click it. Use the up arrow icon to show all of your hidden notification area icons if you do not see the OpenVPN Connect icon right away. (Tip: You can drag and drop the OpenVPN icon from the hidden icons to the "pinned" icons to keep it there permanently.)

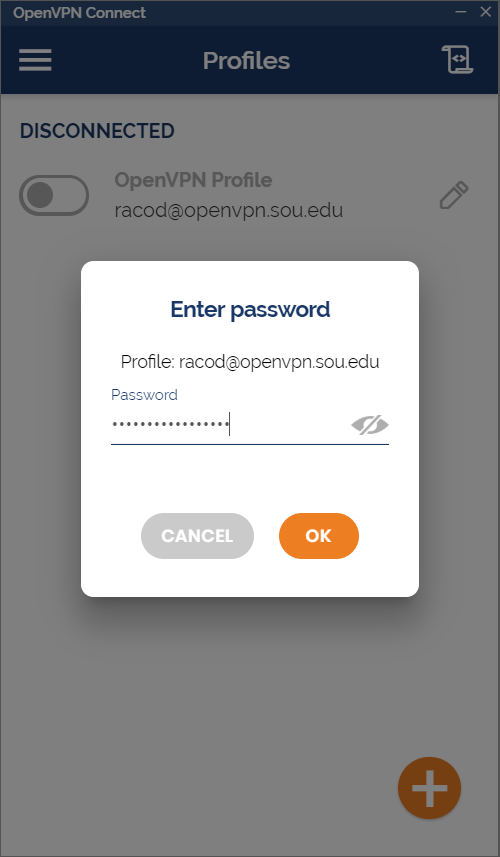
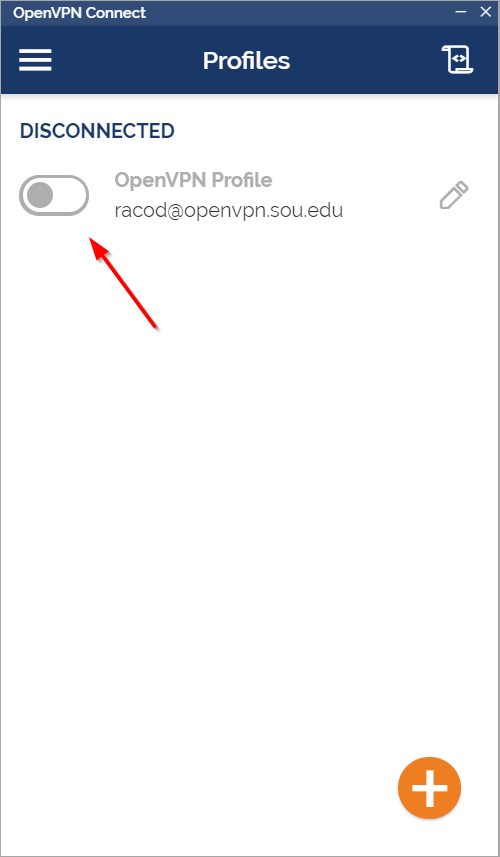
Within the app window, click on the toggle button next to the connection you set up earlier.
Enter your password.

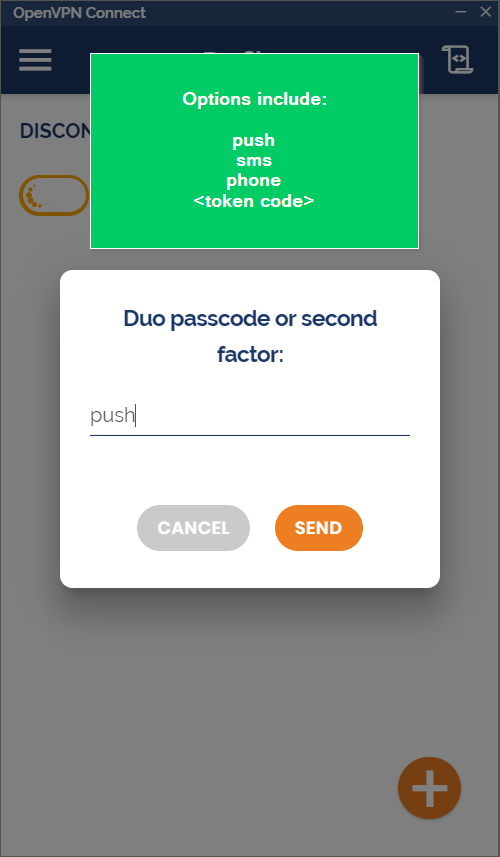
Authenticate with Duo.

If you do not have a Duo device that you can access away from your office, contact your Computing Coordinator immediately or follow these instructions to self-enroll another Duo device, such as a cell phone or a home phone.
You may enter any of the following into the text field, then click Continue, to complete this step (don't include any quotation marks). If you have more than one phone enrolled in Duo, you can append "2" or "3" (or higher) to the push option, the sms option, and the phone option to refer to that device specifically. (Example: push2, phone2, sms2; push3, phone3, sms3) Because it is difficult to know which phone is identified by which number, we recommend that you start with no numbers, then append "2", then append "3" if "2" does not work, and so forth until you receive the push notification, the text message, or the phone call on whichever phone you have access to at the time.
- "push" - Enter this to receive a push notification from Duo on your enrolled smart phone.
- "sms" - Enter this to receive a text message from Duo on your enrolled smart phone or cell phone.
- "phone" - Enter this to receive a phone call from Duo on your enrolled smart phone, cell phone, or desk phone.
- token code - If you have a Duo token or want to use a passcode stored in the Duo app on your smart phone, enter the code in the text field.
If you receive a connection error at this point, contact your Computing Coordinator right away. We have observed an issue where some computers running Windows 10 build 1803 cannot connect to our VPN service through the client. Updating to the latest build of Windows 10 fixes the issue, and your Computing Coordinator can guide you through that process if your device requires it.
When the connection is successful, you will see a screen indicating that you are connected. It will also show you network traffic information. You can now close the window and start working.
Step 2 - Connect Your SOU Network Drives (P, S, and X)
When you boot up your SOU laptop on campus, it automatically connects to your network drives for you because they are reachable. When you boot up your SOU laptop at home, it cannot reach the network drives yet, so it skips connecting to them. Now that you have connected to the VPN service, we can finally connect to your SOU network drives.
Connect to your P drive and the S drive
Double click the MapNetworkDrives.cmd script file in your RemoteAccess folder on your desktop. You should briefly see a command line window appear on your screen with some text in it. You can ignore the window. It will close on its own when the script finishes.
Connect to the X drive (for faculty)
Double click the MapCourseDrive.cmd script file in your RemoteAccess folder on your desktop. You should briefly see a command line window appear on your screen with some text in it. You can ignore the window. It will close on its own when the script finishes.
Verify that the drives connected
You should see them in the quick access columns along the left side of the File Explorer window where you just ran the scripts. You can now access them as you normally would at work.

 Macintosh Instructions
Step 1 - Launch the OpenVPN Connect client and connect to openvpn.sou.edu
You will find the OpenVPN Connect client in your Applications folder. Launching it should bring up the connection window, but if it doesn't, then look for the OpenVPN Connect icon in your menu bar near your system clock in the top-right region of your screen. Clicking it will bring up the connection window.

After the connection window is open, follow the instructions from Step 1 - Launch the OpenVPN Connect client and toggle the connection of the Windows instructions for connecting because the steps are exactly the same.
Step 2 - Connect your SOU Network Drives (P, S, and X)
After you have connected to the VPN service on your Macintosh, you can manually connect your SOU network drives as you normally would by following these instructions.
How to Disconnect from the VPN Service
When you are finished with your work, please disconnect from the VPN service to free up resources for other users.
Windows Instructions
You can disconnect by left-clicking on the OpenVPN Connect client icon in the notifications area to bring up the app window again, then click on the toggle to disconnect. You may also right-click on the OpenVPN Connect client icon in the notifications area and select Disconnect from the menu.
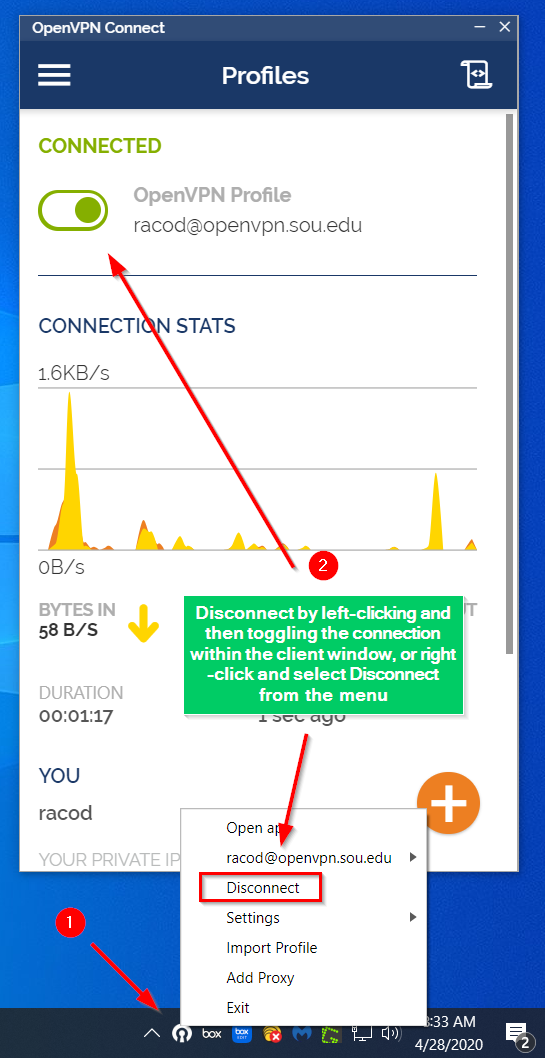
You will receive a notification from Widows that you are now disconnected from the VPN service. The OpenVPN Connect icon will also change back to its disconnected state.
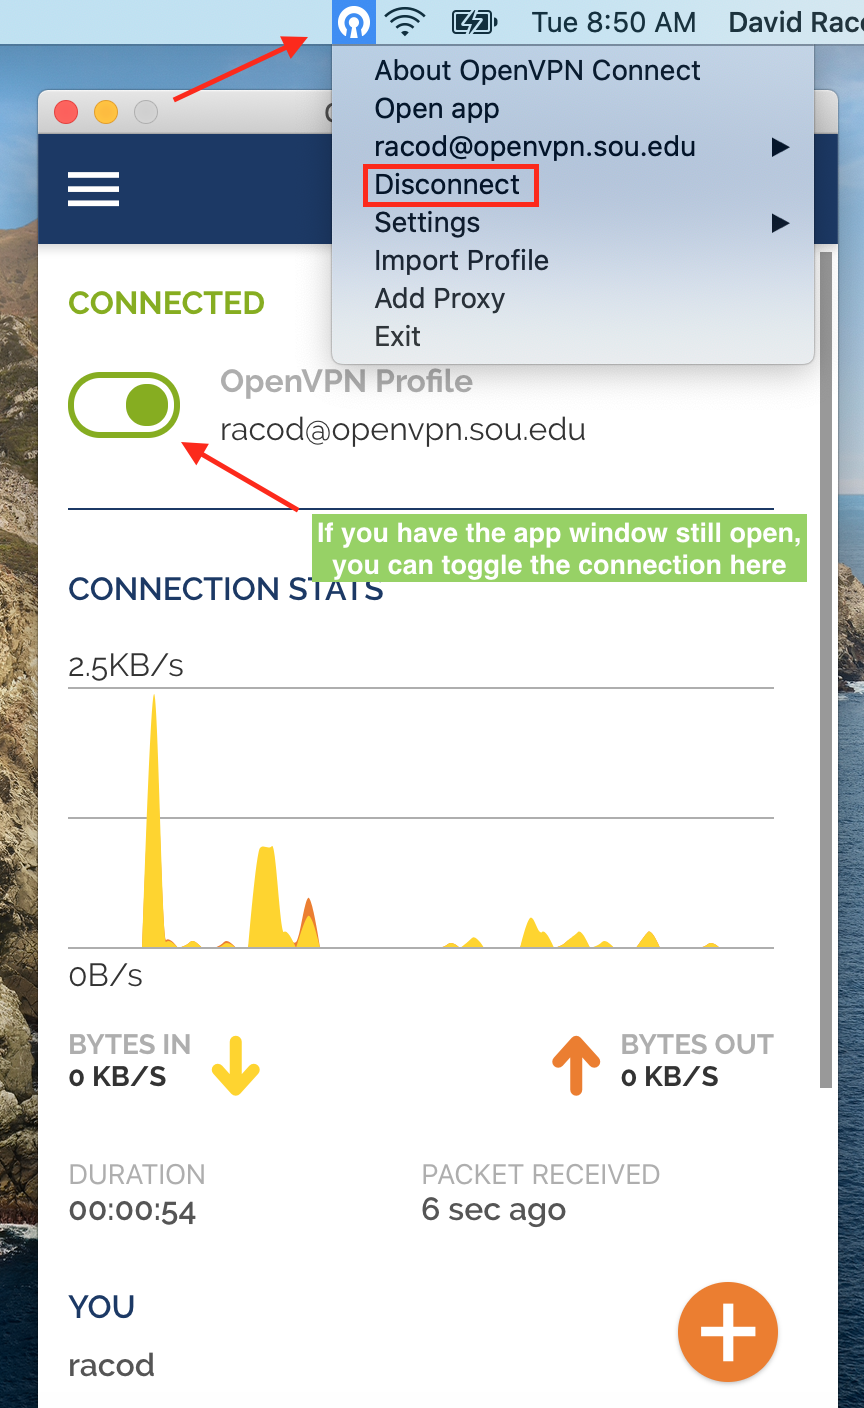
Macintosh Instructions
Click on the OpenVPN Connect client icon in your menu bar. You can then click Open app to bring up the app window, where you can click on the toggle icon to turn off the connection, or you can click on Disconnect in the menu.
Add a comment
Please log in to submit a comment.