

Adding printing credits is necessary to print in the computer labs, the Hannon Library, and at the Green Print Stations. You can determine whether a printer charges by clicking Rates after logging into PaperCut.
You can add printing credits in increments of $1, $2, $5, $10, $20 by charging a credit card.
If your printing credit balance is zero, you won't be able to print in the computer labs, the Hannon Library, and at the Green Print Stations..
Student employees are not charged for work-related printing, unless you print to a computer lab, the Hannon Library or a Green Print Station.
Do not use those printers for work-related printing!
For instructions to add credits using a Credit Card, including your SOU OneCard, click here.
To add printing credits from a Checking or Savings Account, follow this step by step walk-through:
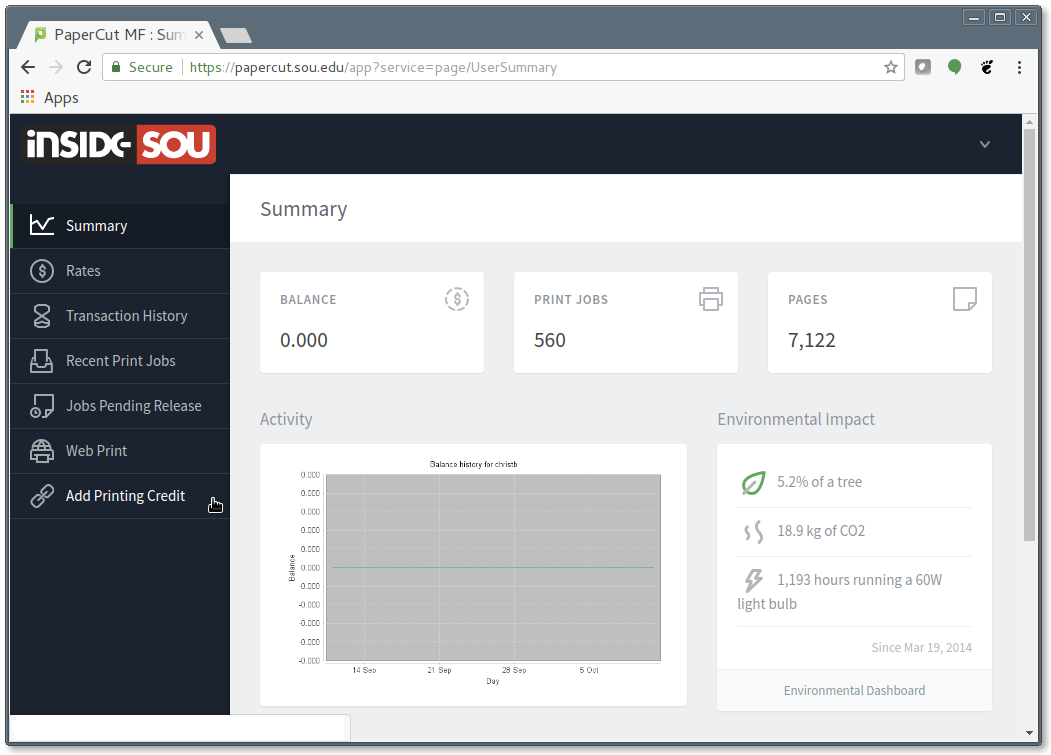
1. Login to PaperCut by clicking on the Printing (Paper Cut) app. Once logged in, click Add Printing Credit.
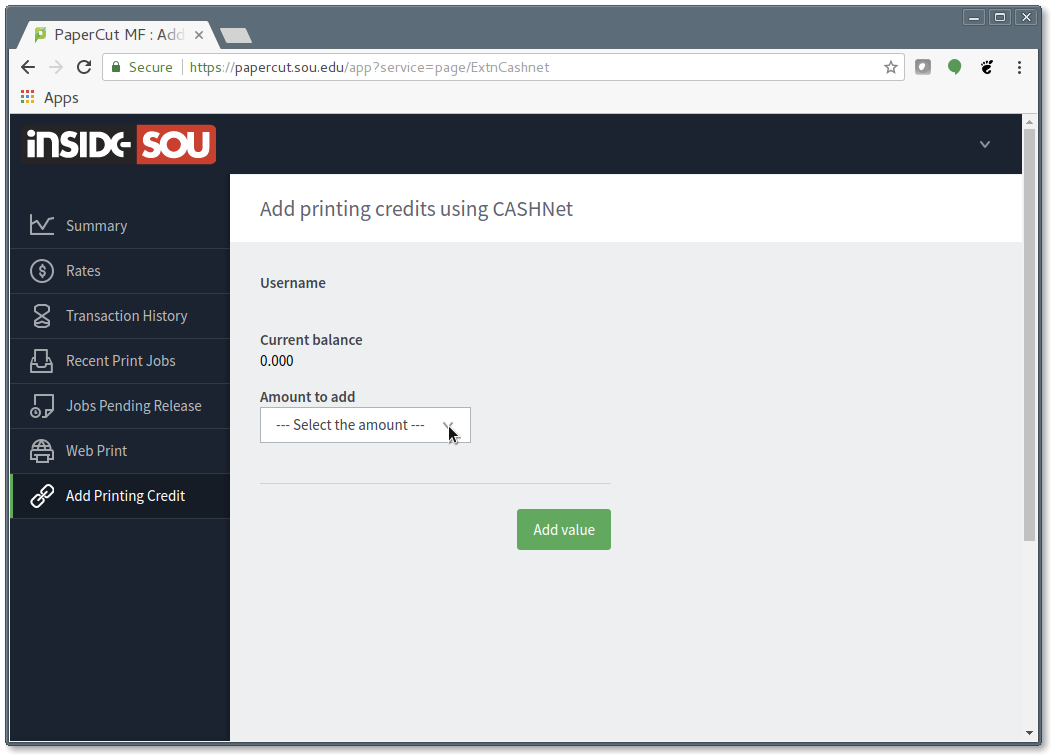
2. Select the amount to add to your print account. You add credits in increments of $1, $2, $5, $10, or $20. After selecting the amount, click the Add value button.
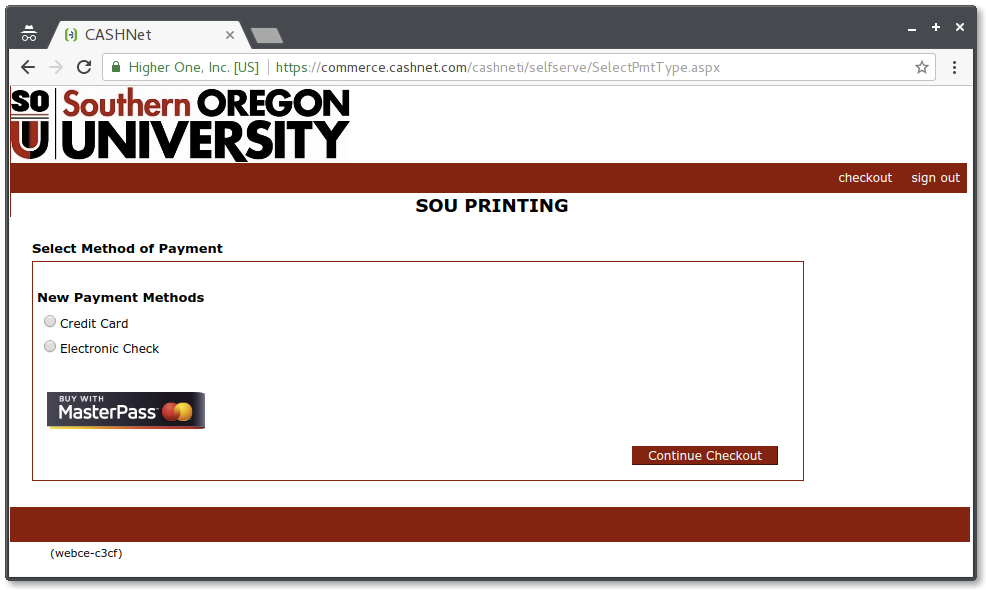
3. You'll be taken to CashNet, where you can select your payment method. Select Electronic Check and click the Continue Checkout button.
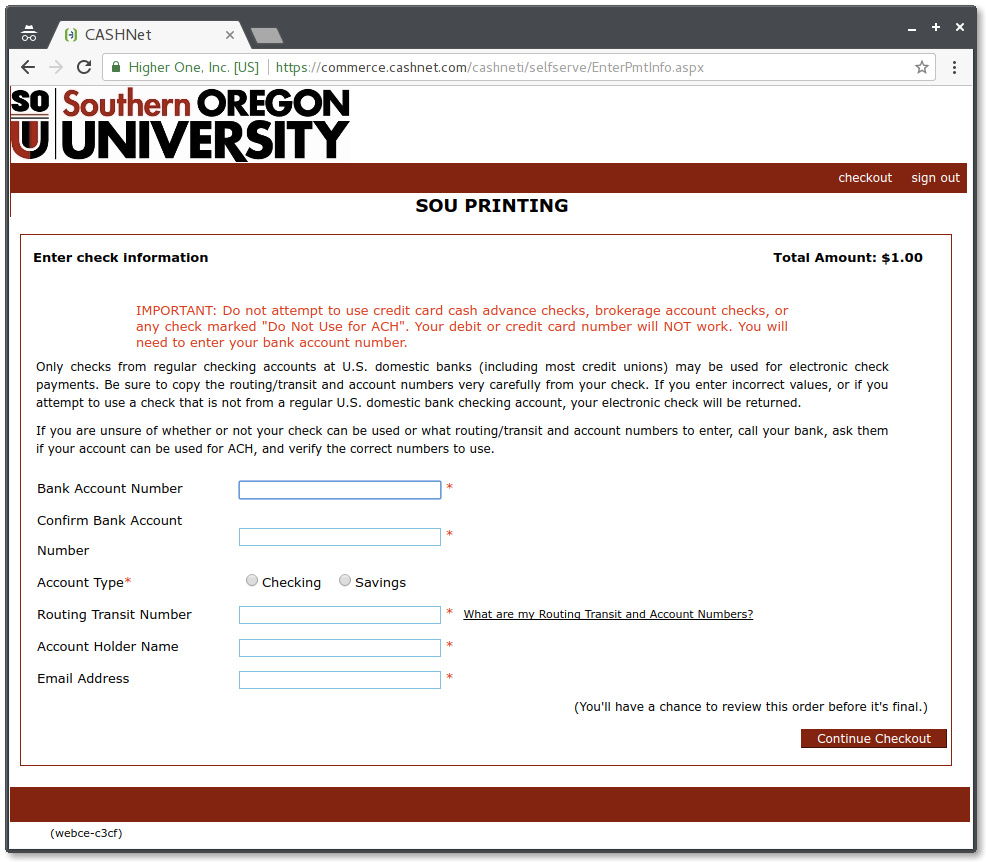
4. Enter your bank account information and, when finished, click Continue Checkout.
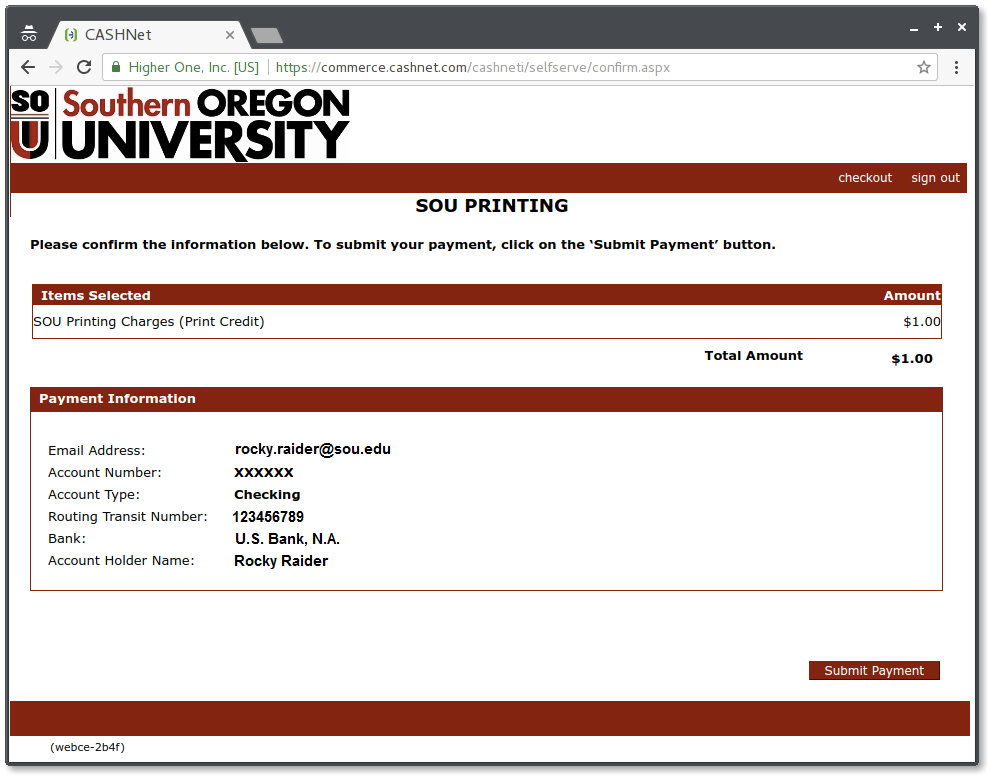
5. Confirm your payment information and click Submit Payment.
6. If your payment is successful, you'll be given a receipt and you'll be returned to PaperCut. Your current balance should show the amount of print credits that you just added. You're now ready to print!
![]()
Add a comment
Please log in to submit a comment.