

This article describes how to use the PaperCut Client on your computer, or the PaperCut console on a copier, to allocate your print and copy charges to either a Shared Account or a PIN. Shared Accounts are usually tied to departments whereas PINs are usually tied to specific index codes, such as an index code associated with a grant.
If you do not see the PaperCut job notification window when you try to print or the PaperCut account selection screen when you log in to a copier, and you know that you should, please contact your Computing Coordinator for assistance.
How to Allocate Charges to a Shared Account
Computer
Step 1) Print as you normally do
The PaperCut Client is programmed to display the account selection window after you click Print but before the job actually leaves your computer.
Step 2) Select the appropriate Shared Account from the Print Job Notification popup window
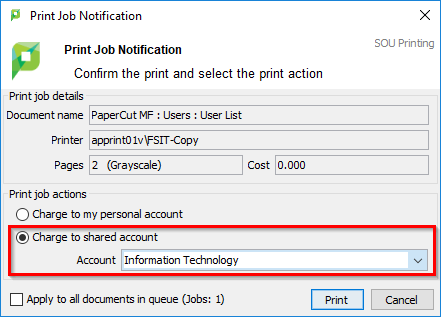
Use the dropdown menu next to Account to choose from the Shared Accounts that apply to you. You can use the option above charge to shared account, charge to my personal account, to allocate your print charges the normal way.
If you are an employee, the charges will go to the department(s) that you are a member of. If you are a member of multiple departments, each department that you work for will get billed for the print job, which is why you should allocate your charges to the appropriate department shared account if this applies to you. (Unfortunately PaperCut has no way of reading your mind to discover which department you are about to print for. If you don't tell it, it bills all of them.)
If you are a student, charging to your personal account will cause the print job to count against your print credits. Students should only allocate print chargers to a Shared Account when they are printing for work with the university.
If you are a student worker who accidentally allocated a work-related print job to your personal account, you can request a refund.
Step 3) Click Print in the Print Job Notification popup window
The job will now print as usual and the charges will be allocated to the Shared Account you selected.
Copier
Step 1) Log in using MEAP
The copier should give you the option of using your username and password or your SOU ID number (940XXXXXX) to log in.
Step 2) Select the Shared Account from the list of accounts
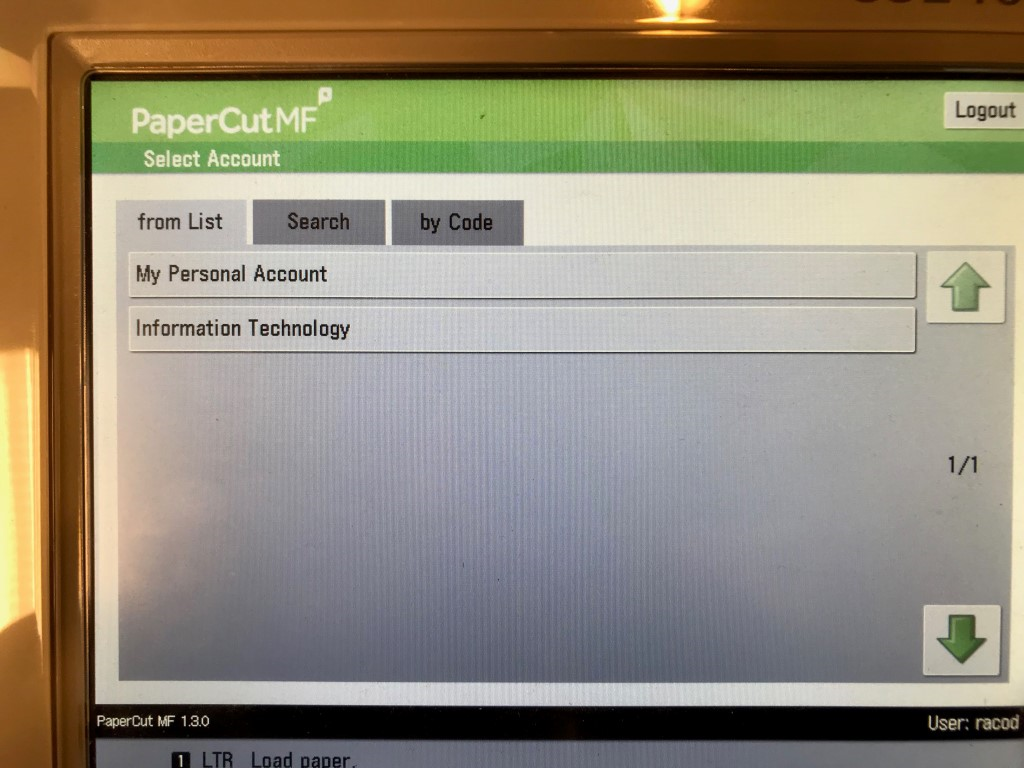
Please refer to the computer instructions for an explanation of the difference between charging to a Shared Account and charging to your Personal Account.
Step 3) Make your copies as usual
Make all of your copies that need to be allocated to your selection in the previous step. If you need to change how the charges should be allocated after making some number of copies, you will need to log out of the copier and then log back in to repeat Steps 1 and 2.
How to Allocate Charges using a PIN
Computer
Step 1) Print as you normally do
The PaperCut Client is programmed to display the account selection window after you click Print but before the job actually leaves your computer.
Step 2) Enter the appropriate PIN within the Print Job Notification popup window
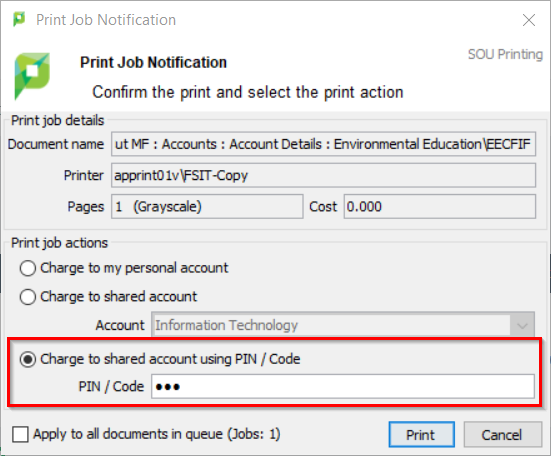
It is normal to only see this option if you are meant to be using a PIN. If you do not see this option but you think you should be able to print using a PIN, contact your Computing Coordinator.
Step 3) Click Print in the Print Job Notification popup window
The job will now print as usual and the charges will be allocated to the PIN you used.
Copier
Step 1) Log in using MEAP
The copier should give you the option of using your username and password or your SOU ID number (940XXXXXX) to log in.
Step 2) Enter the PIN using the "by Code" tab
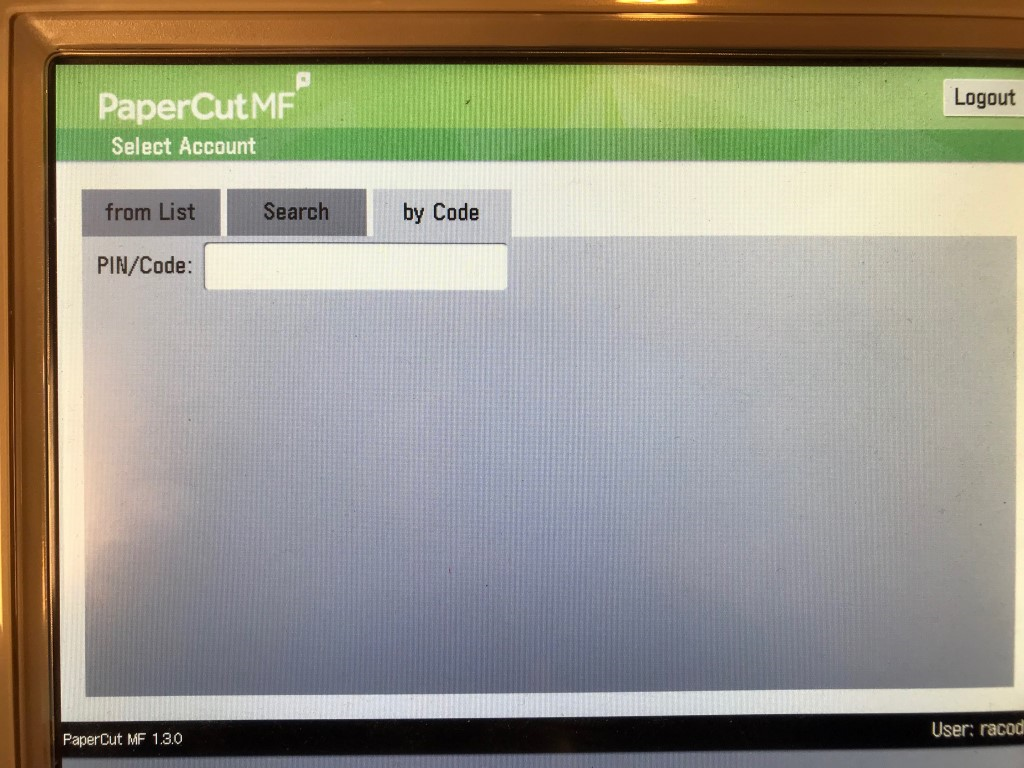
After selecting the "by Code" tab, which you will only see if you are meant to be using a code, tap within the PIN/Code text box to bring up the onscreen keyboard. Enter the PIN and then log in.
Step 3) Make your copies as usual
Make all of your copies that need to be allocated to the PIN you entered in the previous step. If you need to change how the charges should be allocated after making some number of copies, you will need to log out of the copier and then log back in to repeat Steps 1 and 2.
Add a comment
Please log in to submit a comment.