

This article will show you how to connect to SOU's VDI (Virtual Desktop Infrastructure) using the VMware Horizon Client.
Step 1 - Download and Install the Client
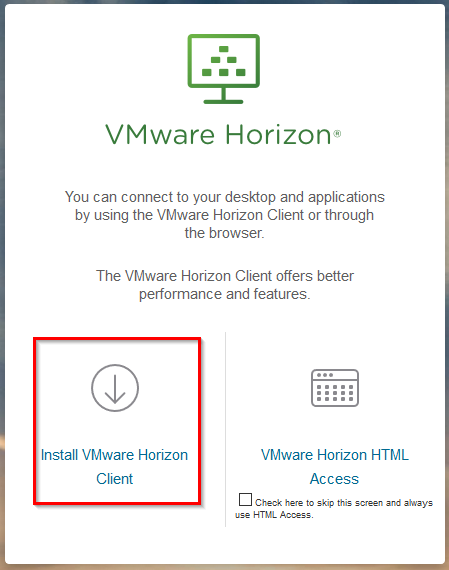
Direct your web browser to https://view.sou.edu and click the button to Install VMware Horizon Client.
The button will redirect your web browser to VMware's downloads webpage where you should select the version of the VMware Horizon Client that matches your platform. Be sure to click on the Go to Downloads link next to the version that you want in order to be taken to the actual download page for that version of the client.
If you need help with this step, you should contact your Computing Coordinator for guidance. You will likely need your Computing Coordinator's help to install the client after you have downloaded it if you are installing the client on a SOU computer, so do not hesitate to contact them.

Step 2 - Setup the Connection to the VDI Server in the VMware Horizon Client
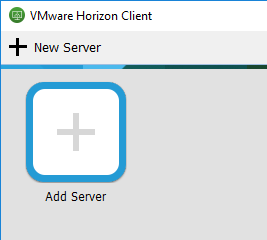
Launch the VMware Horizon Client after installing it and then click on the New Server button or the blank Add Server button.
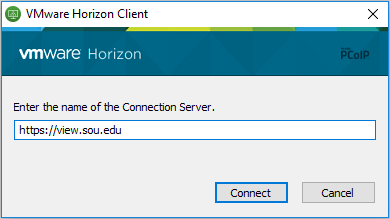
In the dialog box that will appear, enter https://view.sou.edu and then click Connect.
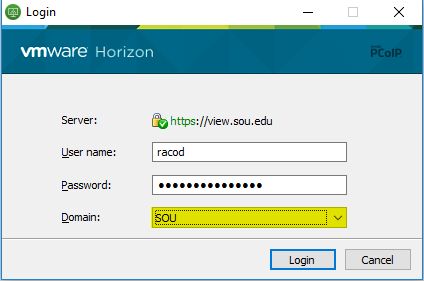
In the next window, enter your SOU username and password and be sure to change the Domain dropdown from ROOT to SOU as shown in the screenshot below, then click Login.
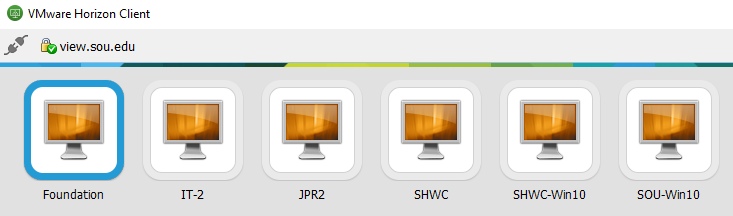
Step 3 - Connect to the Virtual Computer of Your Choice
Which virtual computers are available to you will depend on your role at the university and your present permissions. If you are missing a virtual computer that you believe you should have access to, contact your Computing Coordinator.
Double click on the virtual computer that you want to connect to or right-click on it and select Launch. If you do not know which virtual computer to connect to, contact your Computing Coordinator for guidance.
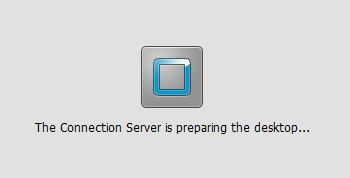
You will see the message "The Connection Server is preparing the desktop" while the client is attempting to connect to the virtual computer.
Step 4 - Using the Virtual Computer
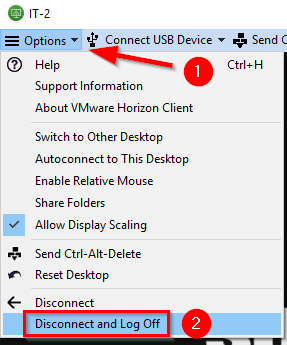
The virtual computer will function just like a normal Windows desktop environment, but there will be some VDI controls visible along the top of the screen. You can use these controls to configure advanced options, connect a USB Device (e.g. to pass through a USB flash drive connected to your physical computer to the virtual computer), and send the Ctrl-Alt-Delete signal if you need to use it. You can also use the window controls in the rightmost portion of the VDI controls bar to minimize the VDI window, resize it, or close it.

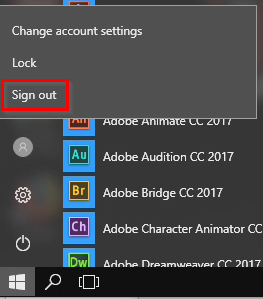
Step 5 - Disconnecting
Instead of terminating the VDI session by closing the VDI window, we recommend that you sign out of Windows on the virtual computer the way you normally would, or you can click the Options button in the VDI controls bar and select Disconnect and Log Off, which will terminate your session cleanly.
If you experience any problems with the VDI Windows desktop environment or the VMware Horizon Client, call the IT Helpdesk at 541-552-6900 or contact your Computing Coordinator.
Add a comment
Please log in to submit a comment.