

SOU uses Box.com now for cloud storage. We recommend that all users store data in Box instead of Google Drive. Visit https://sou.box.com to get started.
This article will show you how to share videos stored in your SOU Google Drive by embedding them into web pages that you control, such as a Moodle course pages. If you need help with uploading content to Google Drive, contact your Computing Coordinator.
If you are unfamiliar with Google Drive and want to learn how to manage your files and share them out, you can consult Google's online support webpage for Google Drive, or you can look through the handout from the IT Department's Google Drive training class. Both are helpful resources.
Step 1 - Set up the proper sharing permissions on your video
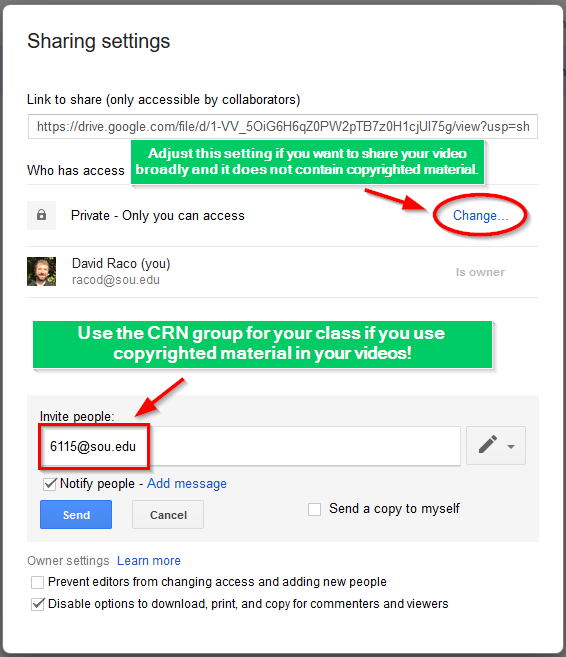
Right-click on the video and select Share.

Click the Change link next to Private - Only you can access under Who has access if you intend to share your video broadly and it does not contain copyrighted material. If you are an instructor using copyrighted material in your video, you may need to restrict who can view your content to just the students in your class. You can do that by using the Invite people text field to share the video with the CRN email group for your class. (E.g. 6115@sou.edu includes all students enrolled in MTH 105.) If you do not want the class to receive an email notice that you just shared the video with them, uncheck the box for Notify people. The Send button will then turn into an OK button that you can click to finalize your sharing settings.
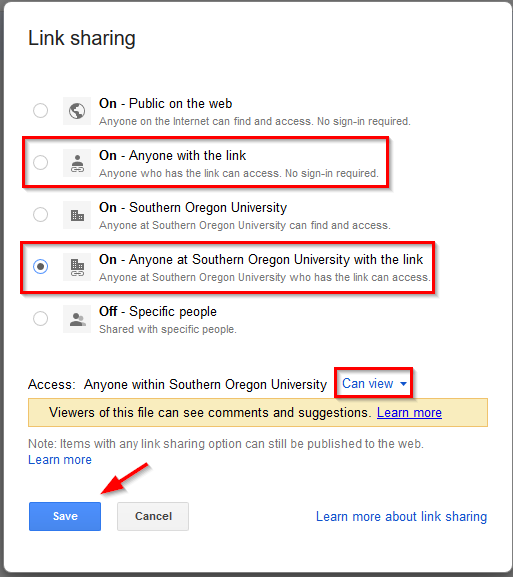
Select the sharing setting that is most appropriate for your content if you are not using copyrighted material.
- The "On - Anyone at Southern Oregon University with the link" setting makes your content available only after viewers have authenticated with a valid SOU account.
- The "On - Anyone with the link" setting makes the content available to anyone without a login.
Make sure that the Access setting is set to Can view before you click Save. You could change it to "Can comment" if you want to allow that. Do not change it to "Can edit."
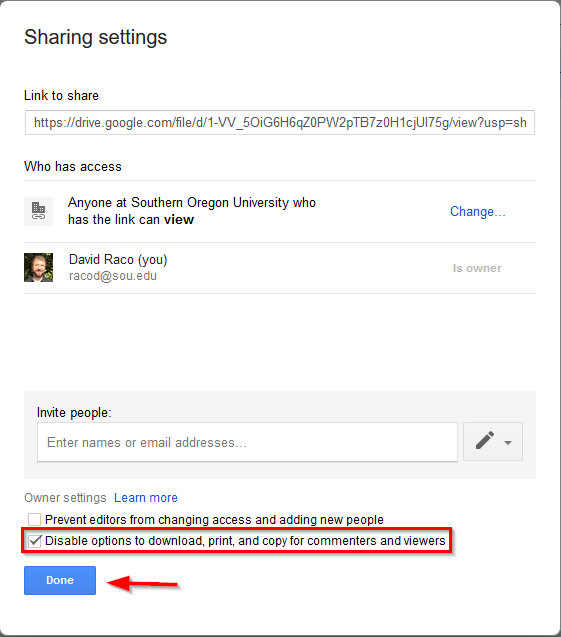
Click Done when you return to Sharing settings. If you are using copyrighted material in your video, you should ensure that the box is checked for disabling download of your content before you click Done.
Step 2 - Open your video and get the embed code
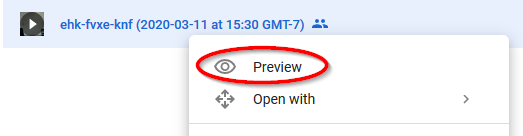
Open your video file by double clicking it or by right-clicking and selecting Preview.
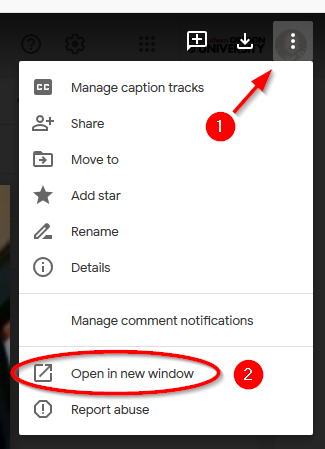
In the Preview window, click on the three vertical dots in the top-right corner of the screen, then click on Open in new window within the menu.
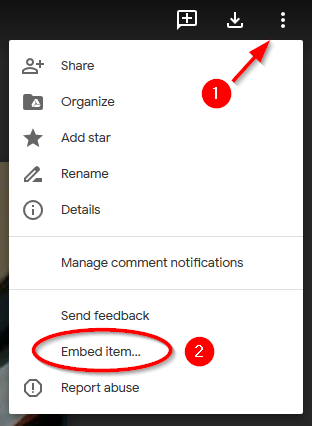
Your video will open again now in its own window. Find the three vertical dots again in the top-right corner of this new screen, click on them, and then select Embed item from the menu.
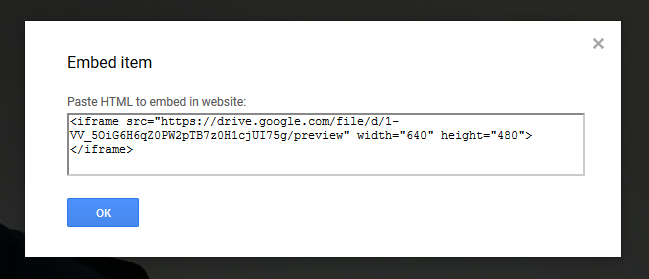
Copy the embed code presented to you in the window that will appear in the center of your screen.
Step 3 - Paste the embed the code where you want your video to appear
For embedding videos into Moodle, click here. For all other web platforms, ask your Computing Coordinator for guidance.
Add a comment
Please log in to submit a comment.