

This tutorial will walk you through opening a cloned git repository on your system, and making a change.
Opening a Repository
Open the "Git GUI" application on your desktop, or from the Start menu.
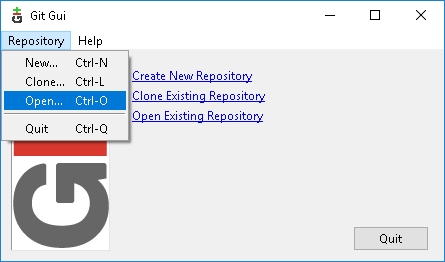
In Git Gui, open the "Repository" menu, and click "Open..."
Click the "Browse..." button to navigate to the git repository folder (Documents > git > esc-scripts).
Click once on the folder to highlight it, and click the "Select Folder" button.
Click on the "Open" menu item.
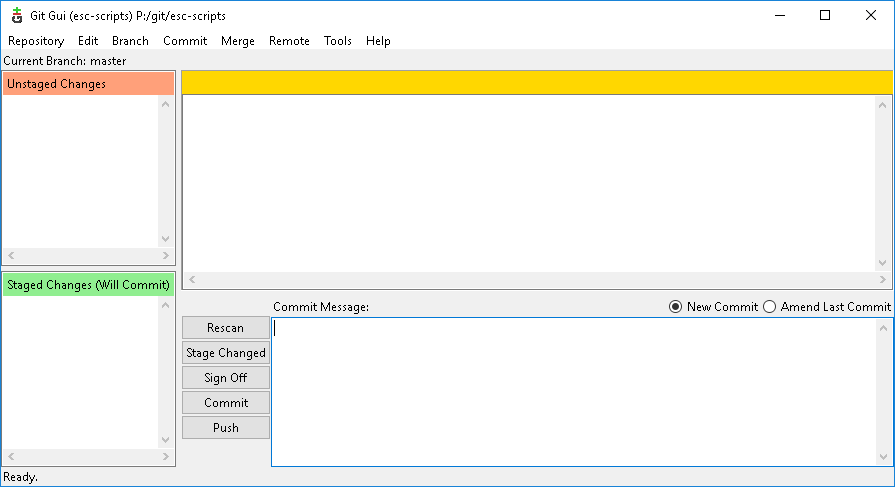
You should then see the screen below.
Making a Change to a Repository
When making a change to a Git repository, follow this process: Pull, Edit, Add, Commit, Push.
Pull
Before making any changes to a repository, you want to make sure you have the latest version of the repository copied to your machine.
To "pull" the latest version:
Open the repository in Git GUI as described above.
Open the "Remote" menu, go to "Fetch from", and click "origin".
Then, open the "Merge" menu, and click "Local Merge..."
Edit
Use the Windows file browser to navigate to the files you want to edit in the git repository.
Right-click on the file you want to edit and select "Edit with Notepad++".
Edit the file as needed.
Click Save to save your changes to your local copy of the file.
Close the file
Add
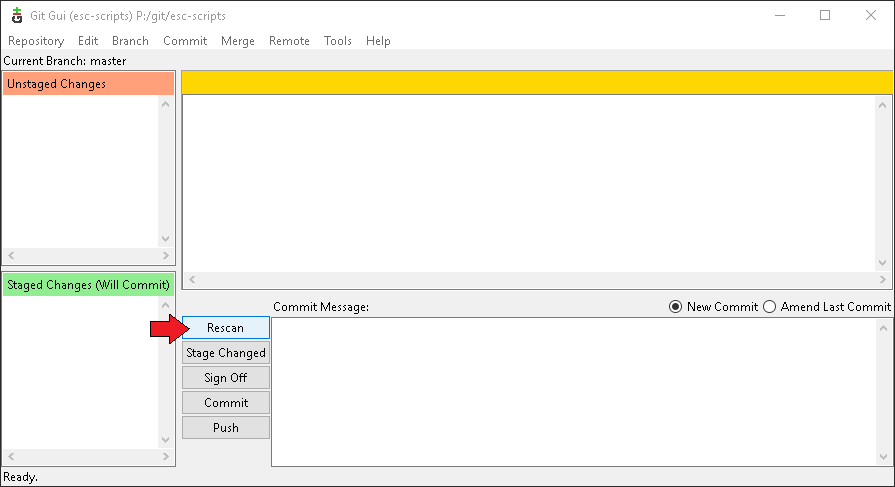
In Git GUI, click the "Rescan" button marked with the red arrow below.
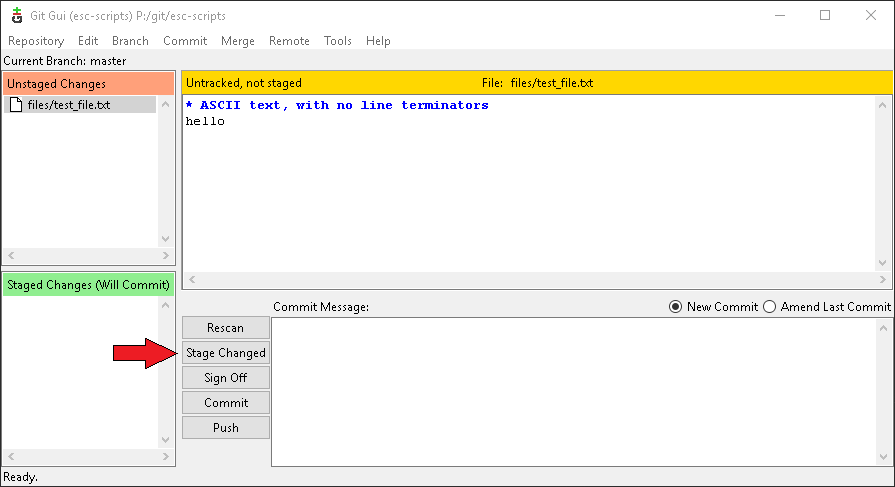
You should see the file you changed show up in the upper left hand corner under "Unstaged Changes".
If you click on the filename, you should see your changes show up in the box with the yellow header.
Below, you can see I changed the file "files/test_file.txt", and the change was the text "hello".
Next, click "Stage Changed" button marked with the red arrow below.
Commit
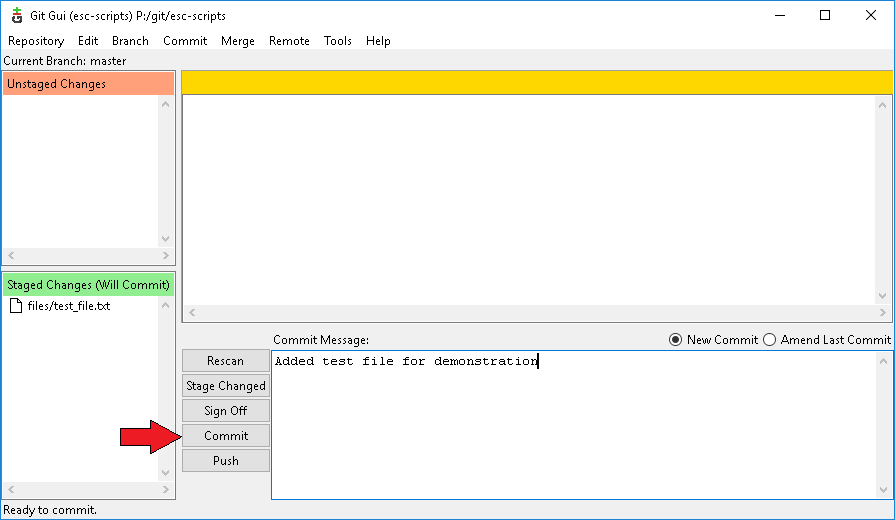
You should see the file you changed show up in the lower left hand corner under "Staged Changes (Will Commit)".
Now enter a message in the "Commit Message" text box describing the changes you made, and click on the "Commit" button marked with the red arrow below.
Push
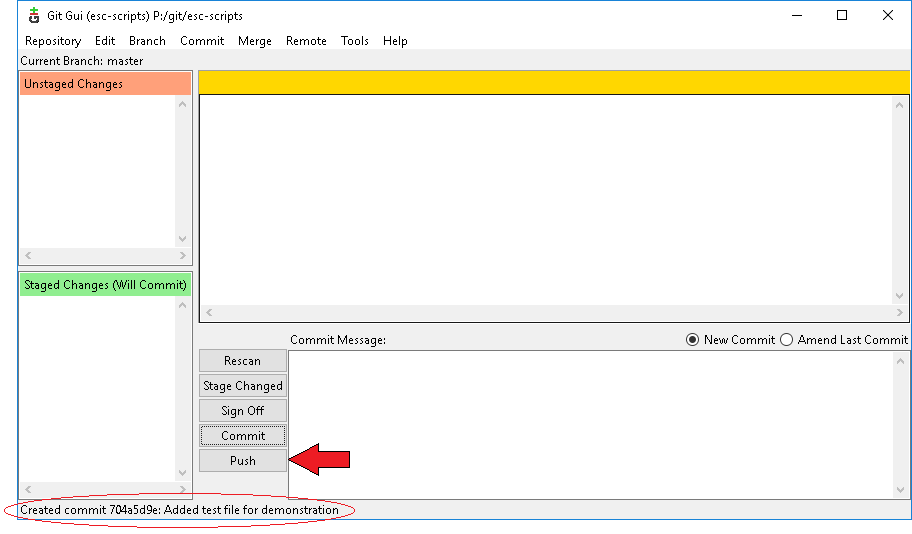
Confirm that see the your commit message show up in the bottom left hand corner as circled below, then click the "Push" button marked with the red arrow below.
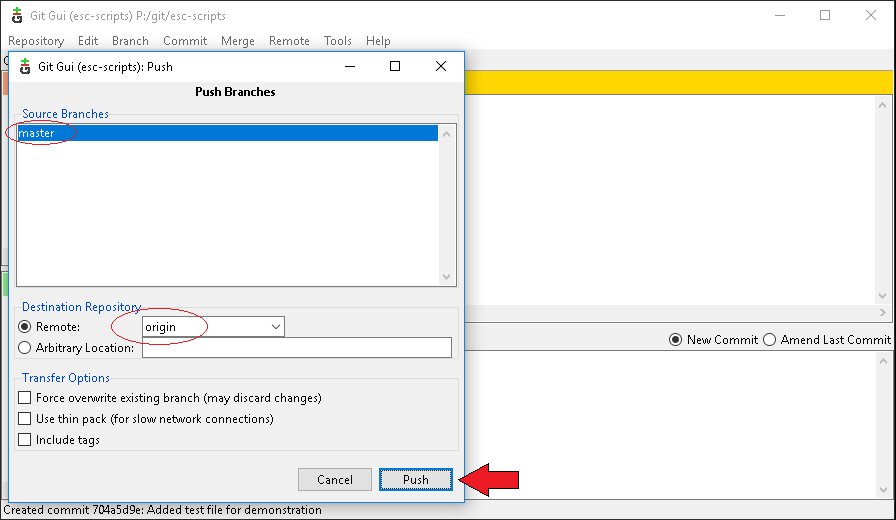
The windows shown below will pop up to allow you to change push settings.
Confirm the settings match what is circled, and then click the "Push" button marked with the red arrow below.
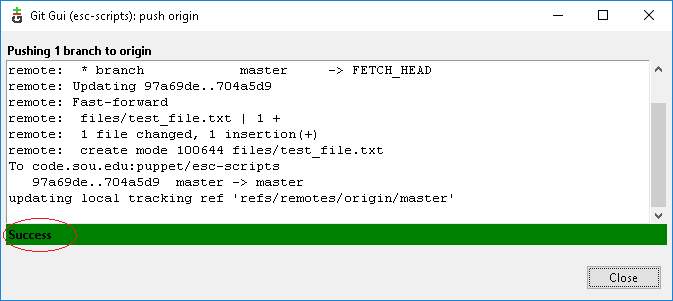
You will then see the following box pop up to show the status of your push.
You should see the green bar with the word success to indicate the push has completed successfully.
You are finished and may close all of the Git windows, or repeat these steps to make another change.
Add a comment
Please log in to submit a comment.